Introduction

How to assemble the X-Gantry of the CRON Craft V2 CNC machine with 400W spindle and belt driven configuration.

  1. Take the X-axis aluminium profile and the spindle assembly and check that the pre-load of the V-wheels are set correctly for this profile. Please refer to the video in Step 2 on how to set the preload of the V-Wheels.
    • Take the X-axis aluminium profile and the spindle assembly and check that the pre-load of the V-wheels are set correctly for this profile. Please refer to the video in Step 2 on how to set the preload of the V-Wheels.

    • Slide the aluminium profile onto the V-wheels of the spindle assembly with the logo on the profile in the same orientation as the spindle assembly.

    • You will see there is an extra cable in the drag chain, this is for the Laser Upgrade Kit. When you add the Laser Upgrade Kit later, you will use this cable.

    • In this video we discuss how to set the preload of the V-wheels. This need to be checked for each V-wheel assembly on the CNC machine.

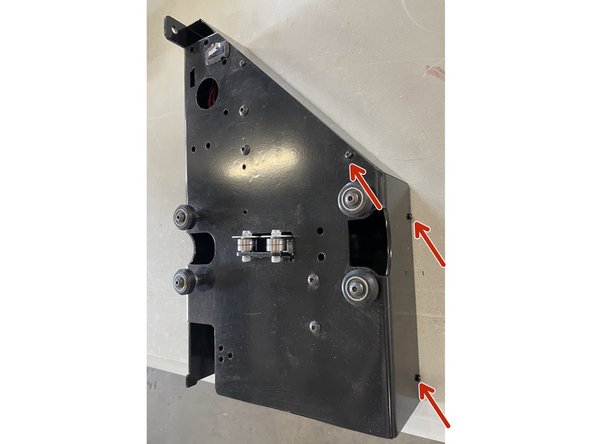
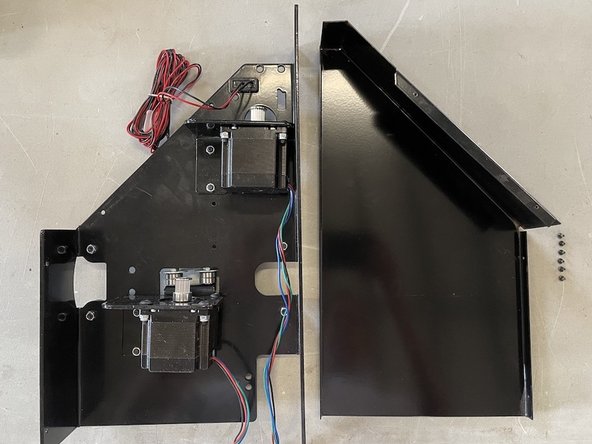
  2. Remove the cover from the left gantry by unscrewing the 6 screws as shown in the pictures with the philips screw driver Remove the cover from the left gantry by unscrewing the 6 screws as shown in the pictures with the philips screw driver Remove the cover from the left gantry by unscrewing the 6 screws as shown in the pictures with the philips screw driver
    • Remove the cover from the left gantry by unscrewing the 6 screws as shown in the pictures with the philips screw driver

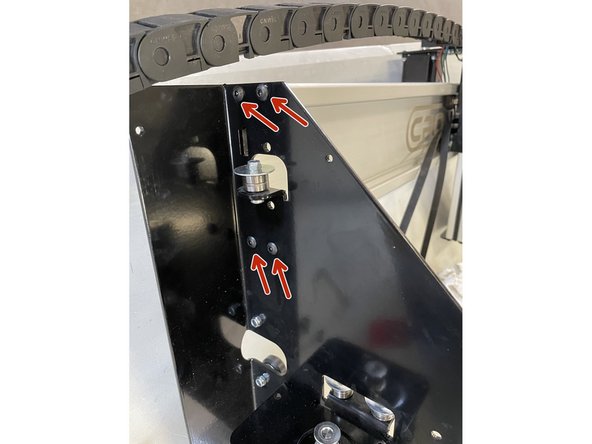
  3. Mount the left gantry to the left side of the aluminium profile with the 4 x M5x16 black button head cap screws. Hook the GT2 Timing belt over the idler pulley with the teeth of the belt to the inside.
    • Mount the left gantry to the left side of the aluminium profile with the 4 x M5x16 black button head cap screws.

    • Hook the GT2 Timing belt over the idler pulley with the teeth of the belt to the inside.

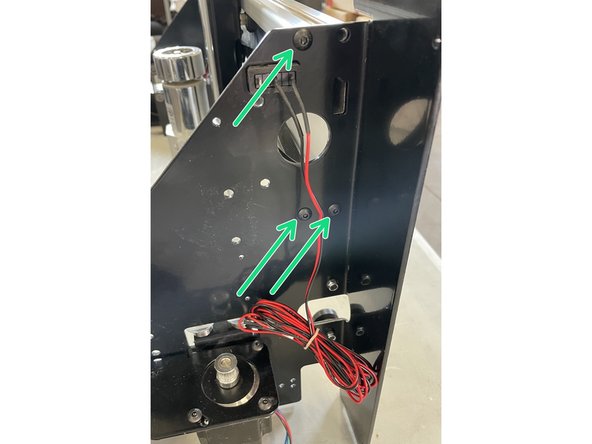
  4. Remove the cover from the right gantry by unscrewing the 6 screws as shown in the pictures with the philips screw driver Remove the cover from the right gantry by unscrewing the 6 screws as shown in the pictures with the philips screw driver Remove the cover from the right gantry by unscrewing the 6 screws as shown in the pictures with the philips screw driver
    • Remove the cover from the right gantry by unscrewing the 6 screws as shown in the pictures with the philips screw driver

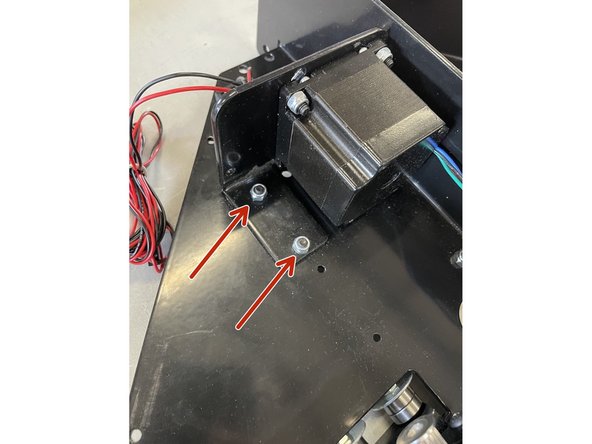
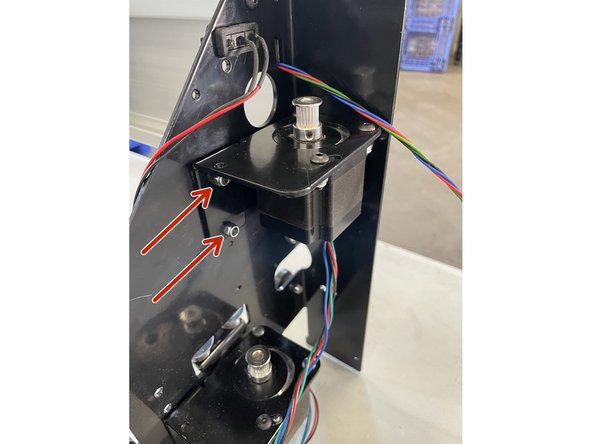
  5. Remove the 2 screws holding the top motor inside the right gantry with the 3mm Allen Key and No 8 Spanner. Mount the right gantry to the right side of the aluminium profile with 3 of the M5x16 black button head cap screws.
    • Remove the 2 screws holding the top motor inside the right gantry with the 3mm Allen Key and No 8 Spanner.

    • Mount the right gantry to the right side of the aluminium profile with 3 of the M5x16 black button head cap screws.

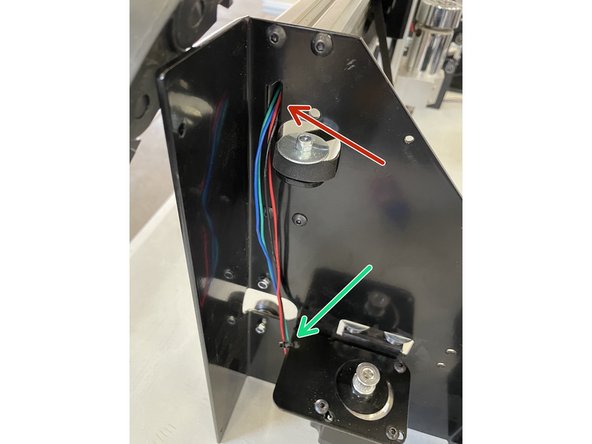
  6. Feed the motor cable from the left gantry through the aluminium profile all the way to the right side as shown in the pictures. Tie this motor cable down to the motor bracket with a 2.5mm cable tie as shown in the picture.
    • Feed the motor cable from the left gantry through the aluminium profile all the way to the right side as shown in the pictures.

    • Tie this motor cable down to the motor bracket with a 2.5mm cable tie as shown in the picture.

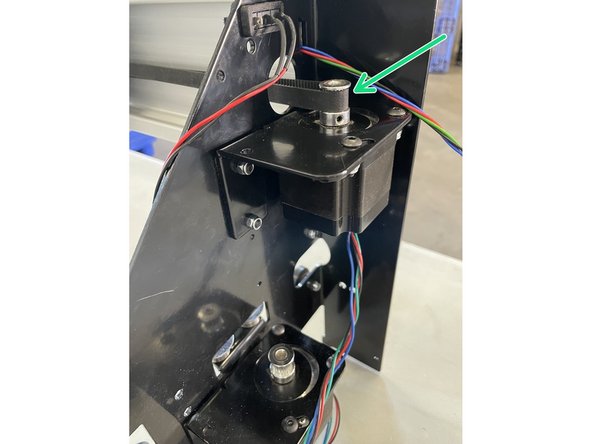
  7. Mount the right stepper motor back to the right gantry as it was previously with the same screws. Hook the GT2 Timing belt over the pulley before you fully tighten the screws holding the motor.
    • Mount the right stepper motor back to the right gantry as it was previously with the same screws.

    • Hook the GT2 Timing belt over the pulley before you fully tighten the screws holding the motor.

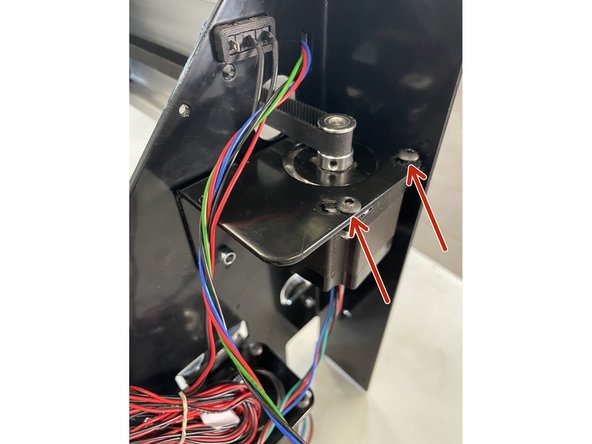
  8. To tension the GT2 timing belt, loosen the 2 front screws holding the motor.  You will need to use the 3mm Allen key and sharp nose pliers, because a spanner cannot get in close enough.
    • To tension the GT2 timing belt, loosen the 2 front screws holding the motor. You will need to use the 3mm Allen key and sharp nose pliers, because a spanner cannot get in close enough.

    • Rotate the motor by hand, anti-clockwise when seen from the top and tighten the 2 screws again.

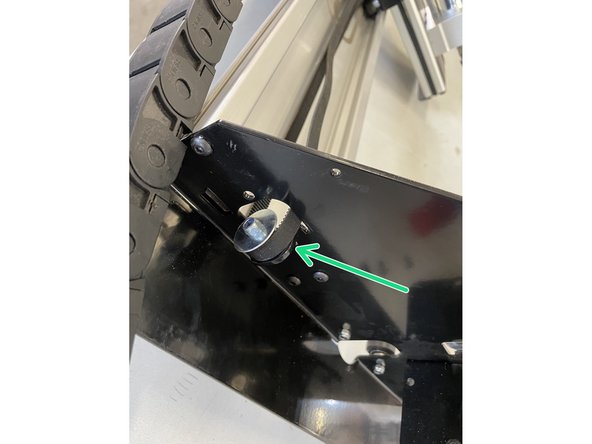
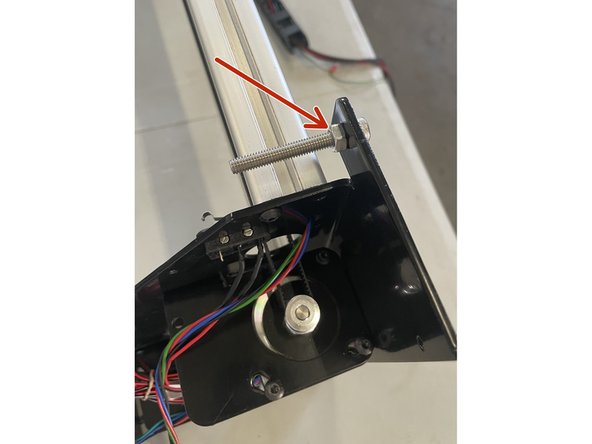
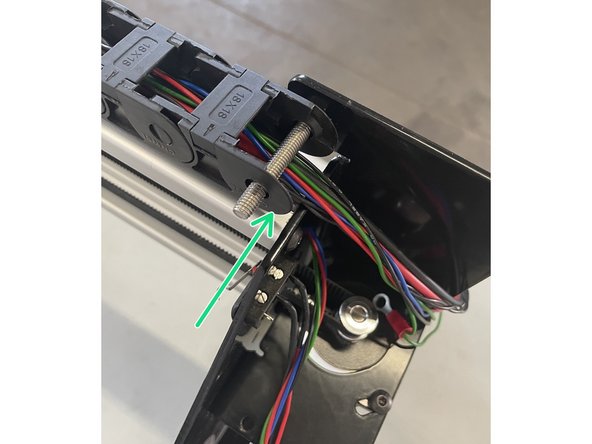
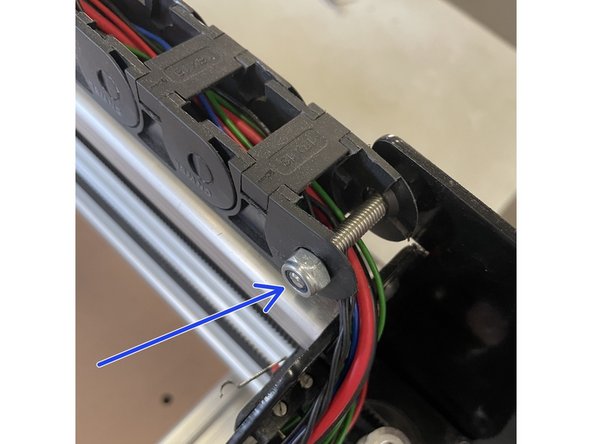
  9. Mount the M6x40 cap screw to the right gantry as shown in the picture with the M6 nut.  For this you will need the 4mm Allen Key and the No 10 spanner. Slide the drag chain from the spindle assembly over the M6 screw with the cables below the screw. Lock the drag chain in place with the M6 lock nut.  Tighten the lock nut with the No 10 Spanner.
    • Mount the M6x40 cap screw to the right gantry as shown in the picture with the M6 nut. For this you will need the 4mm Allen Key and the No 10 spanner.

    • Slide the drag chain from the spindle assembly over the M6 screw with the cables below the screw.

    • Lock the drag chain in place with the M6 lock nut. Tighten the lock nut with the No 10 Spanner.

  10. Fasten the green earth cable with a M5x16 black button head cap screw to the 4th hole into the aluminium profile.
    • Fasten the green earth cable with a M5x16 black button head cap screw to the 4th hole into the aluminium profile.

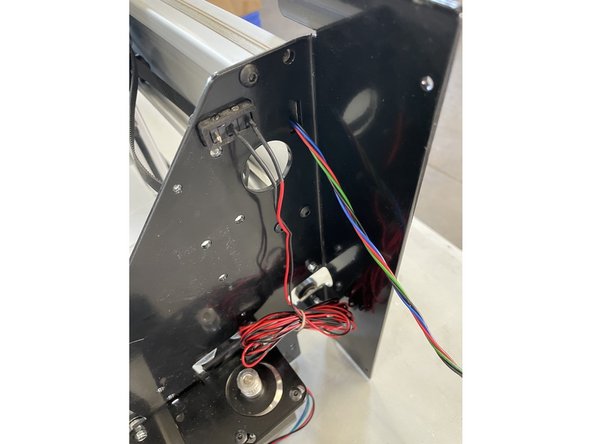
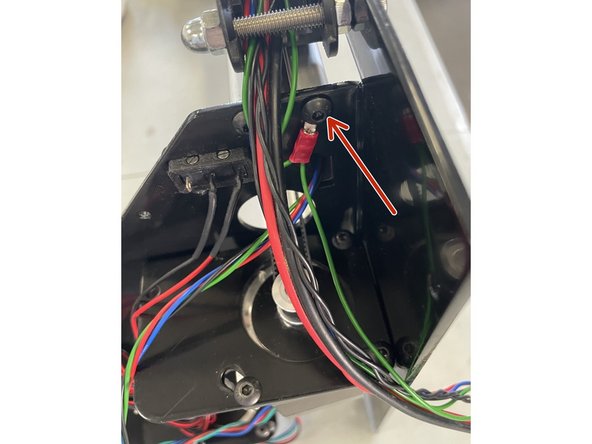
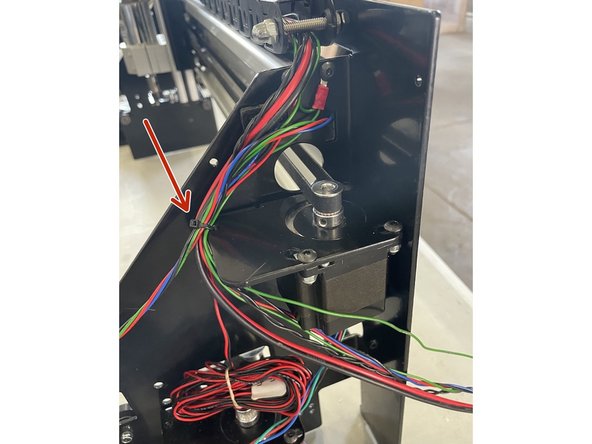
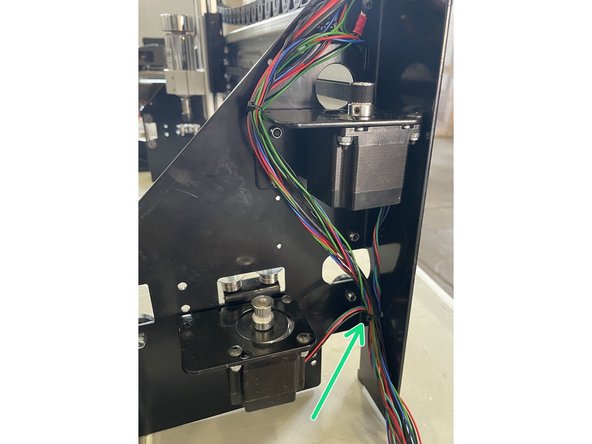
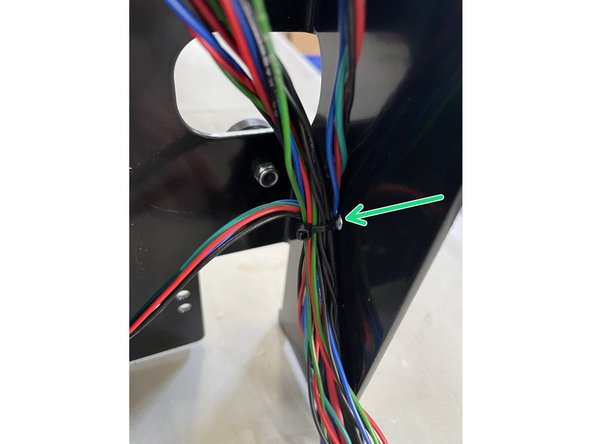
  11. Route the cables through the right gantry as shown in the pictures.  First tighten them with a cable tie to the top motor bracket. Add the cables of the two stepper motors to the harness and tighten the harness to the back of the right gantry as shown in the pictures. Make sure the cables are not touching the GT2 belt.
    • Route the cables through the right gantry as shown in the pictures. First tighten them with a cable tie to the top motor bracket.

    • Add the cables of the two stepper motors to the harness and tighten the harness to the back of the right gantry as shown in the pictures.

    • Make sure the cables are not touching the GT2 belt.

Finish Line

Paul Cronje

Member since: 10/05/2018

6,123 Reputation

46 Guides authored

0 Comments

Add Comment

View Statistics:

Past 24 Hours: 1

Past 7 Days: 7

Past 30 Days: 22

All Time: 99