
-
-
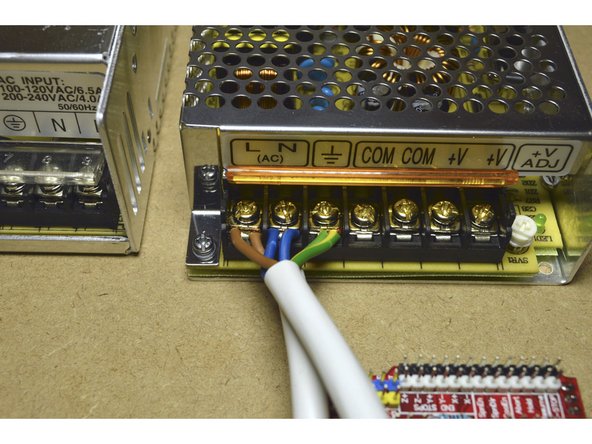
Connect the 220V Power Cable and the 220V Bridge Cable to the 100W Power Supply as shown in the picture
-
The Brown cable goes to L, the Blue cable goes to N and the Yellow and Green cable goes to Ground.
-
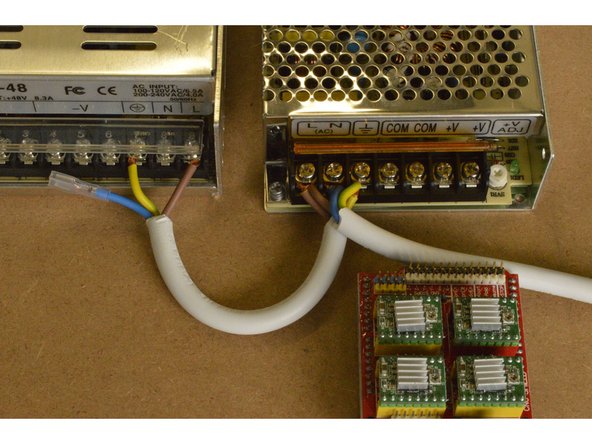
Connect the other end of the 220V Bridge Cable to the L and Ground ports of the 400W Power Supply as shown. The blue cable with the crimp terminal is not connected at this stage.
-
Make sure all the screws holding the cables are tightened with the phillips screw driver
-
-
-
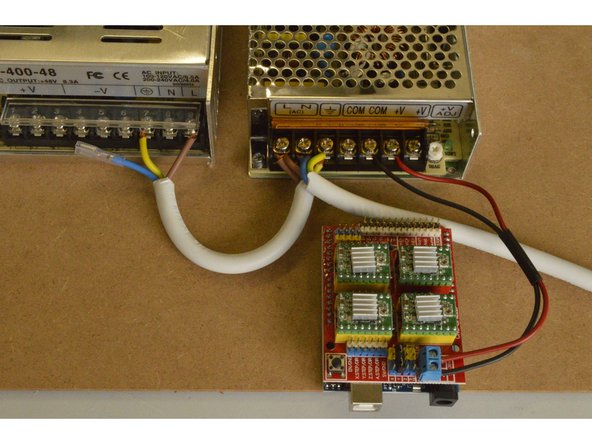
Connect the Arduino Power Cable to the 100W Power Supply
-
The red cable connects to V+ and the Black cable connects to COM
-
Connect the other end to the power connector on the CNC shield. The Red Cable is + and the Black Cable is -.
-


Cancel: I did not complete this guide.
13 other people completed this guide.
3 Comments
Hi There. please see this link for the Earth cable connection.