1. Arduino Power Cable
    • Arduino Power Cable

    • 220V Bridge Cable

    • 220V Power Cable

  2. Phillips Screw Driver
    • Phillips Screw Driver

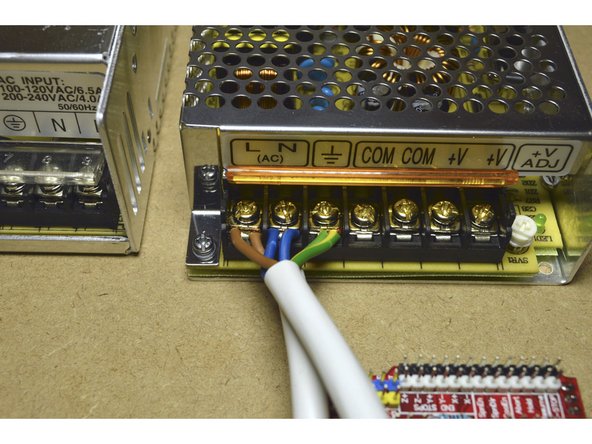
  3. Connect the 220V Power Cable and the 220V Bridge Cable to the 100W Power Supply as shown in the picture The Brown cable goes to L, the Blue cable goes to N and the Yellow and Green cable goes to Ground.
    • Connect the 220V Power Cable and the 220V Bridge Cable to the 100W Power Supply as shown in the picture

    • The Brown cable goes to L, the Blue cable goes to N and the Yellow and Green cable goes to Ground.

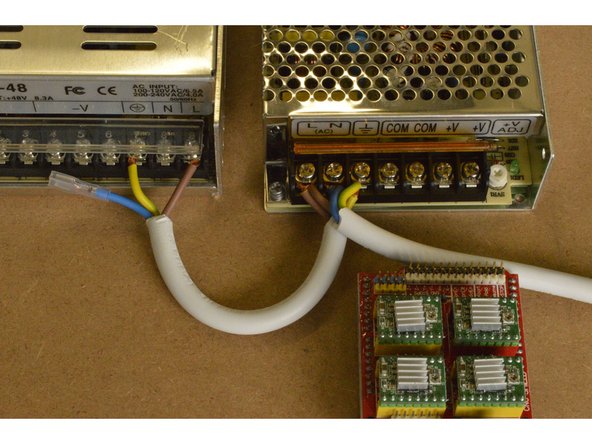
    • Connect the other end of the 220V Bridge Cable to the L and Ground ports of the 400W Power Supply as shown. The blue cable with the crimp terminal is not connected at this stage.

    • Make sure all the screws holding the cables are tightened with the phillips screw driver

  4. Connect the Arduino Power Cable to the 100W Power Supply
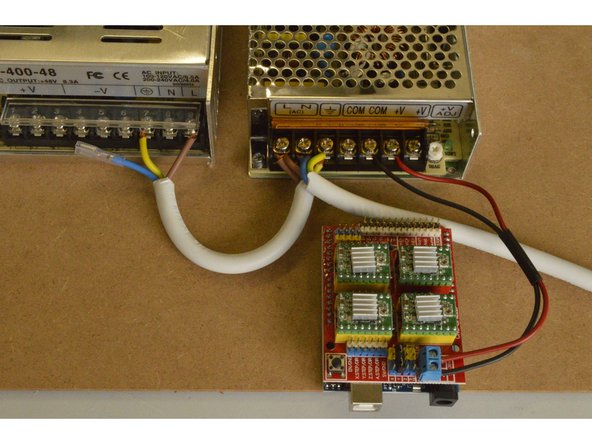
    • Connect the Arduino Power Cable to the 100W Power Supply

    • The red cable connects to V+ and the Black cable connects to COM

    • Connect the other end to the power connector on the CNC shield. The Red Cable is + and the Black Cable is -.

    On my 100w power supply there is no com port. Where do I then add the black cable? There is only a v+, v- port

    Zjuan - Reply

Finish Line

13 other people completed this guide.

Paul Cronje

Member since: 10/05/2018

6,123 Reputation

46 Guides authored

3 Comments

Done………………..

Francois Maritz - Reply

Where do you connect the earth cable my machine keeps shocking me

Cobus - Reply

Hi There. please see this link for the Earth cable connection.

21. Mount Electronics Board

Paul Cronje -

Add Comment

View Statistics:

Past 24 Hours: 2

Past 7 Days: 5

Past 30 Days: 23

All Time: 5,443